
So you need to add you Facebook Pixel or Google Analytics to your website. Chances are you’re nervous about having to add or edit coding to your website. I get it.
The Solution: Google Tag Manager
While you still have to do it at least once, by managing these code snippets in Google Tag Manager, you’ll only have to edit the part on your website once. If you need to add new scripts in the future, you can do in Google Tag Manager instead of waiting for your website person to do it.
While I’m comfortable adding code into my website header, I like Google Tag Manager because it’s easier to see which codes I have installed at a glance, and because it makes my website load faster.
Another nice thing about Google Tag Manager is that it saves your different updates. So if you make a big mistake, you can go back to a previous version of your workspace.
What I have in My Tag Manager
Any time I need to add a new piece of code to my header to use a new tool, I add it to my Google Tag Manager. As I already have the Tag Manager code on my website, it will automatically update on my website (though it might take a day to start working).
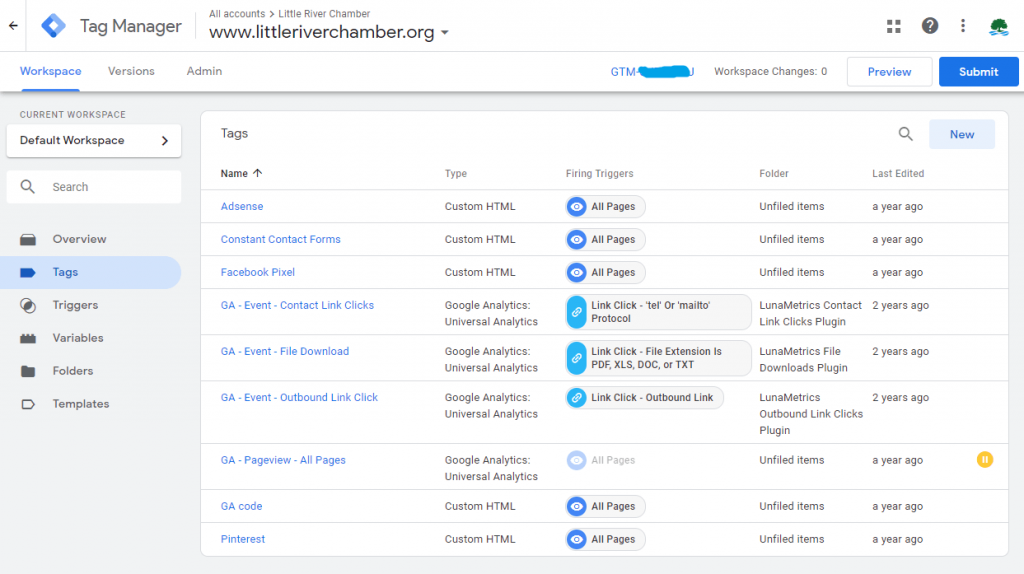
Currently, I have my Facebook Pixel, Pinterest Pixel, ConstantContact, and Google Analytics code saved in Google Tag Manager. There’s also separate triggers that I’ve set up that tell Google Analytics when people download a file, contact us, or click an outbound link.
Recommended: The Facebook Pixel: How to Set Up & Use for Your Chamber
2022 Update: Your Facebook Pixel is now Meta Pixel and the code is changed. If you previously had your Facebook Pixel installed, you DO need to add the new, changed code to your site.
How to Install Google Tag Manager
Adding codes to your website can be hard to explain because it depends on how or who has set yours up.
You can probably pay who ever hosts or created your website to add your code to the website for you. This would be a small maintenance fee.
In that respect, using Google Tag Manager can save you money in the future if you end up with additional codes you need to get on your site. As I said before, you can just add them to Google Tag Manager instead of waiting on your website company to do it for you.
I prefer to do the codes myself since I’m the marketing department at my chamber, and I feel comfortable doing it. It just depends on you or your staffs comfort/skill level.
#1 Create Your Google Tag Manager Account.
Go to https://tagmanager.google.com/.
Make sure you’re logged into your Chamber’s Google account.
If you don’t have one, I would make one. Ours is linked to our Tag Manager, Analytics, YouTube, and more.
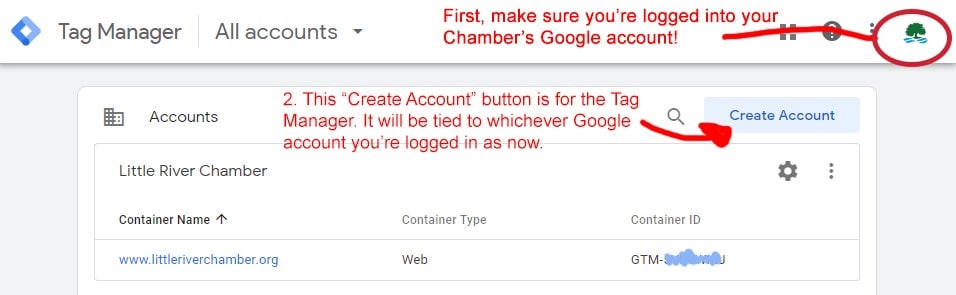
Select the blue “Create Account” text if you don’t already see your chamber listed.
It should be pretty self explanatory, but you list your chamber & website, and select “Web” as the target platform.
#2 Copy your Google Tag Manager Code
Once you’re logged into Google Tag Manager, click your website’s url.
Then choose Admin at the top of the page. You should see this:
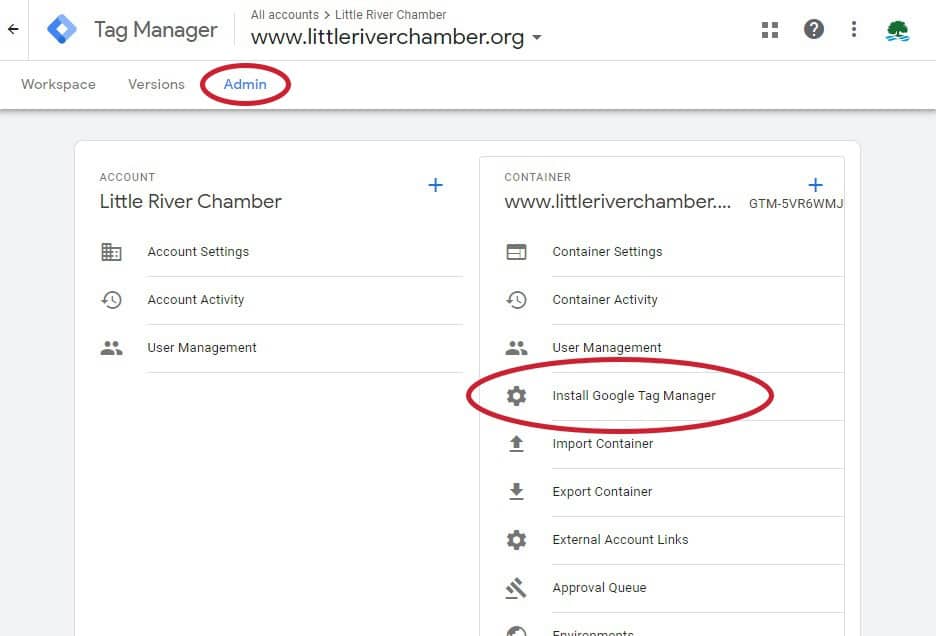
Choose “Install Google Tag Manager, and it’ll pull up your code that looks like this:
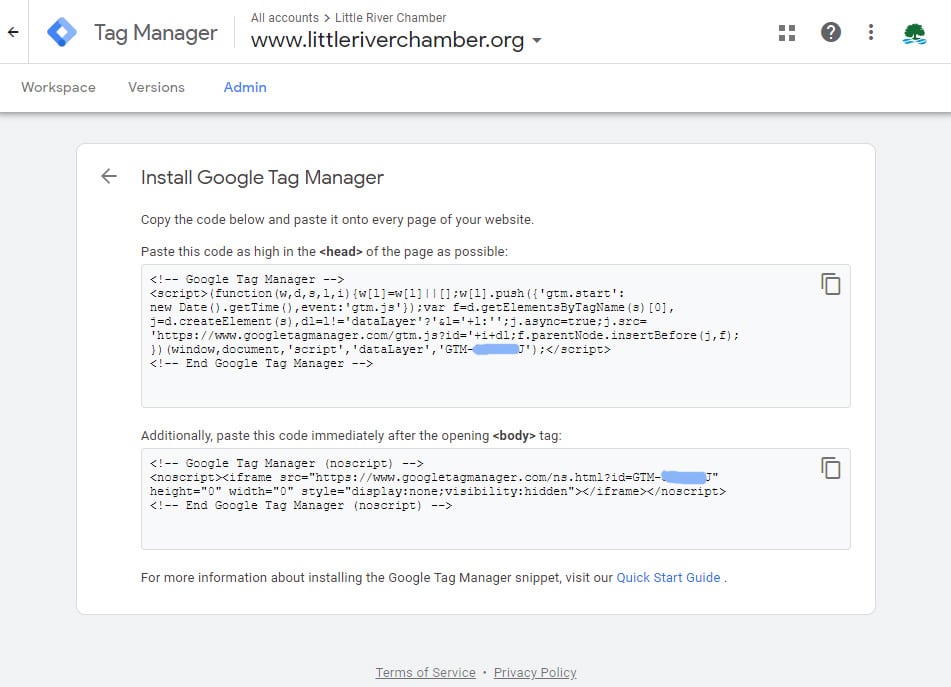
#3 Add your code to the Header & Body sections of your website.
My website content is managed in WordPress.
I installed a free plugin called “Insert Headers and Footers” that lets me add my code to my site without messing up my site’s coding. It looks like this:
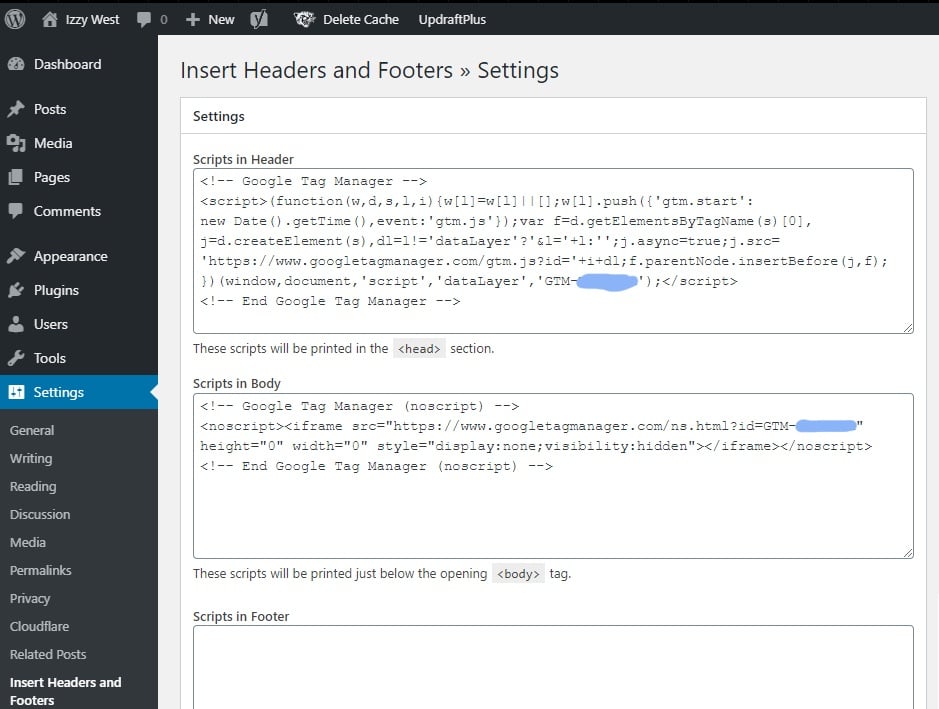
As you can see, all I have to do is copy the code Google Tag Manager provided me, pasted in the designated box, and hit save.
Note: if you know you’ve installed your code on your site and it doesn’t seem to be working, just give it a day to update.
If you don’t have WordPress or don’t know what to do, you need to contact who ever designed or set up your website. Tell them you need to add a tracking code into your website header, and follow their advice.
Adding Codes to Your Tag Manager
In this example, we’re going to add one snippet of code, like the Facebook Pixel. There are a ton of other things it can do, but let’s keep it simple.
#1 If you’re not already, login to Google Tag Manager and click the account (website) you want to work on.
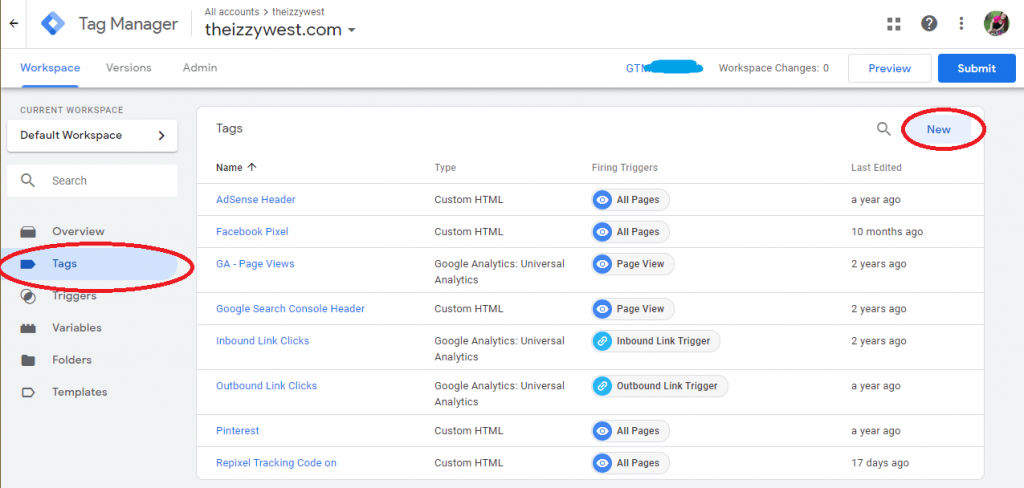
#2 In your Workspace, click on Tags and then New.
#3 Go ahead & name your tag (Facebook Pixel is fine – you just want future you/staff to understand).
#4 Click the empty box under Tag Configuration. Scroll until you see Custom HTML.
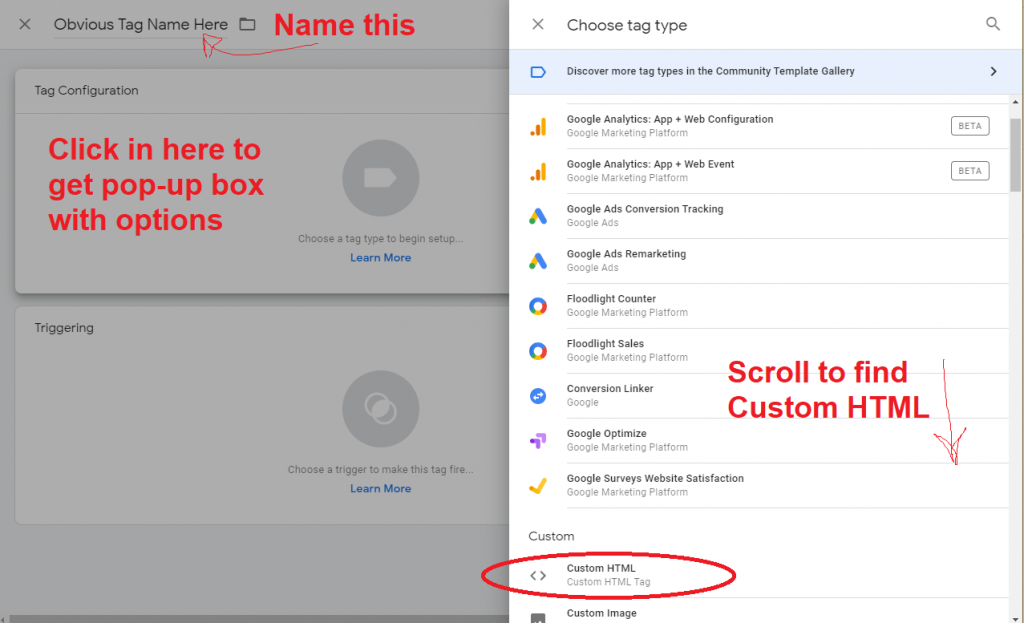
#5 Copy & Paste your code into the HTML box. Hit Save.
Click here to see how to get your Facebook Pixel code.
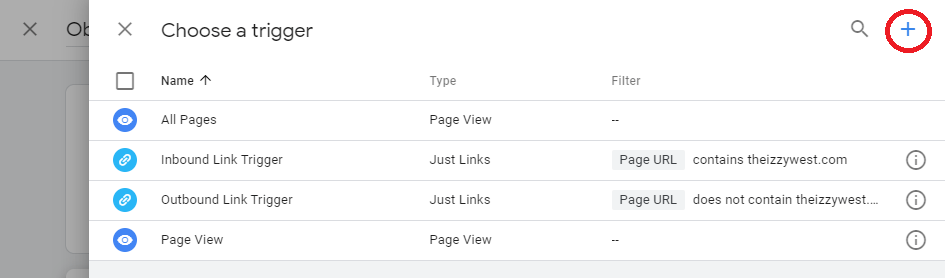
#6 Click the empty box under Triggering. Yours is probably empty, so click the blue plus in the top right corner.
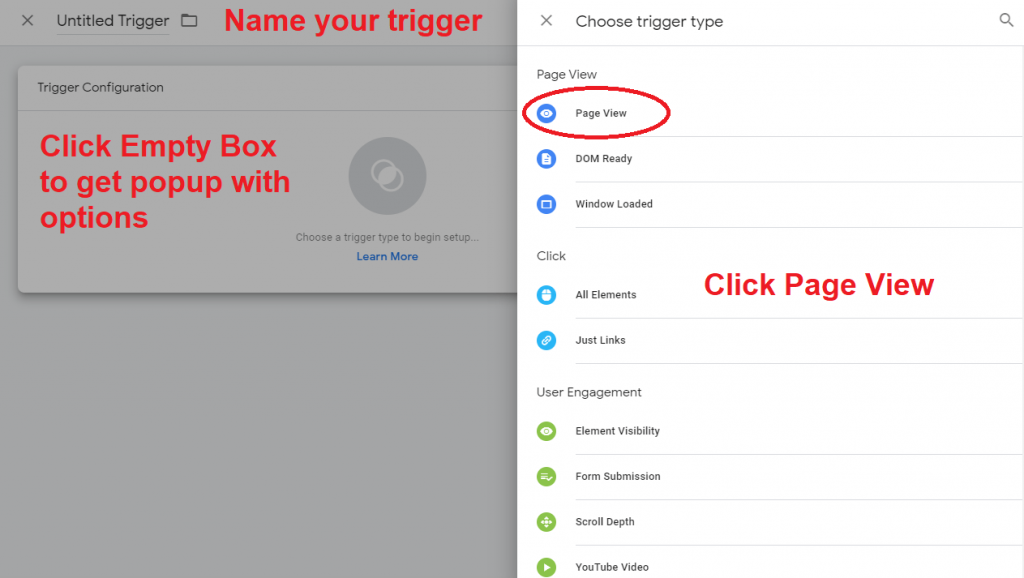
#7 Again, name it something obvious and click to see your options. Choose Page View. Hit Save.
#8 Here’s what your whole recipe should look like. If so, hit Save.
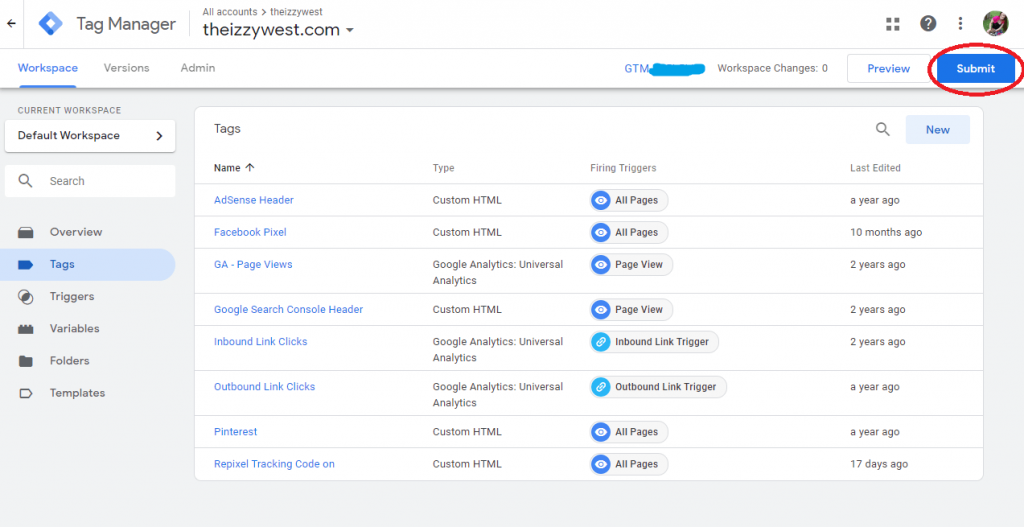
#9 Hit Submit at the top right of your workspace.
You’re almost done, I promise.
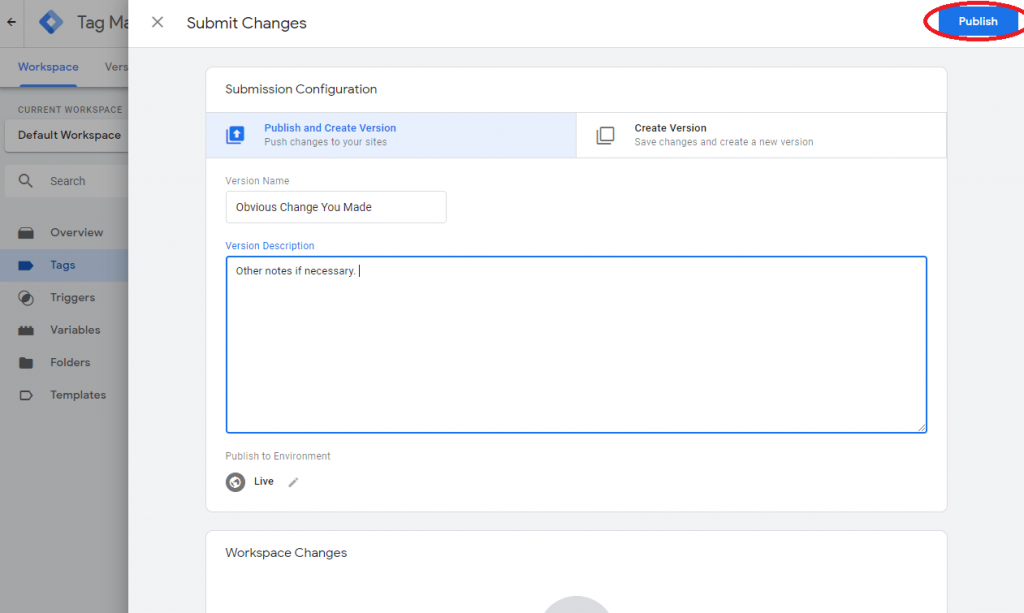
#10 – You can hit publish, but I recommend first filling out the Version Name which will quickly remind you what you did.
This will help you in the future if you need to go back to a previous saved version. Once you’ve done that, hit Publish!
#11 – You’re Live! …Probably.
So you’re technically done (unless you’re adding other codes or tags).
However, I’ve found it’s not quite so immediate. Most of the time I just come back to the next day & check my site and see that it’s been updated.
If you were installing your Facebook Pixel, you can use the Facebook Pixel Helper to see if it’s working on your website.
Otherwise, party – you did it!


No Comments